
Tip: Streamline your student data management with Intake. Find out more here.
You can export a CSV file from RM Integris G2 which can be imported directly into the library system.
Log into the G2 student management information system as an administrator.
From the left-hand side of the main G2 display, click on the 'Reports' tab.
Click 'Administration' from the list in the upper box.
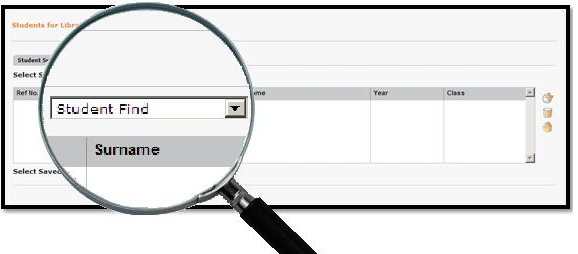
Expand the 'Exports' node and click on the 'Students for Library' report in the lower box.

From the 'Select Students by' box, choose 'Student Find'.
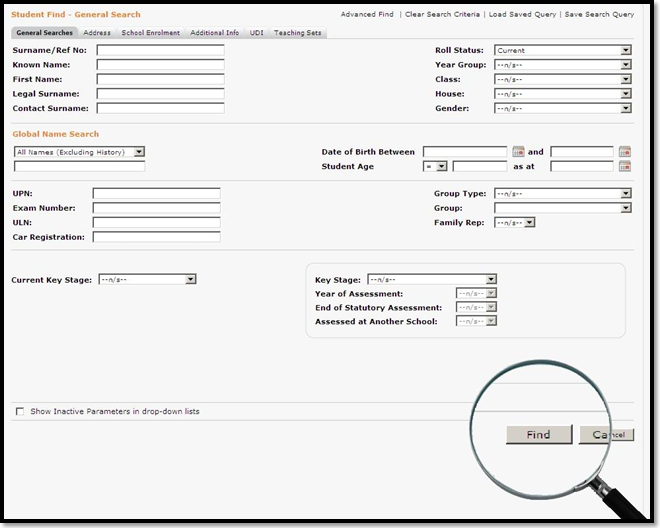
Click on the plus icon ![]() to be taken to the 'General Search' window.
to be taken to the 'General Search' window.
Click on the 'Find' button at the foot of the window.
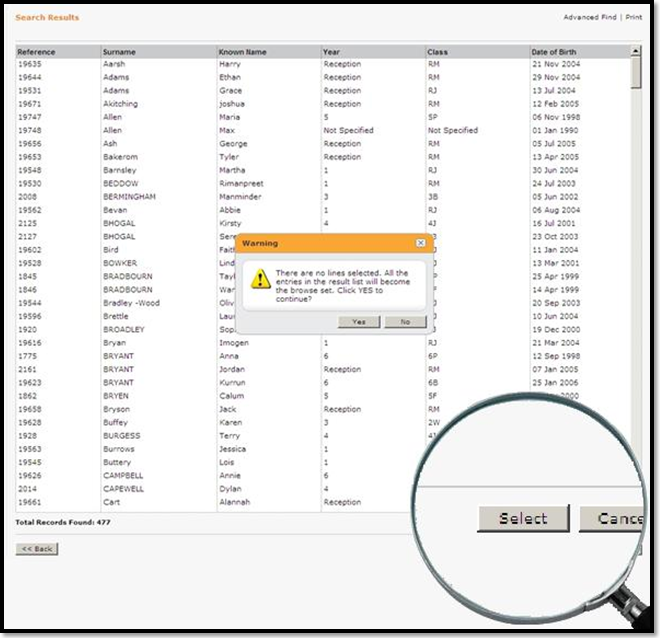
Click the 'Select' button at the foot of the window and answer 'Yes' to the warning dialogue box that appears.
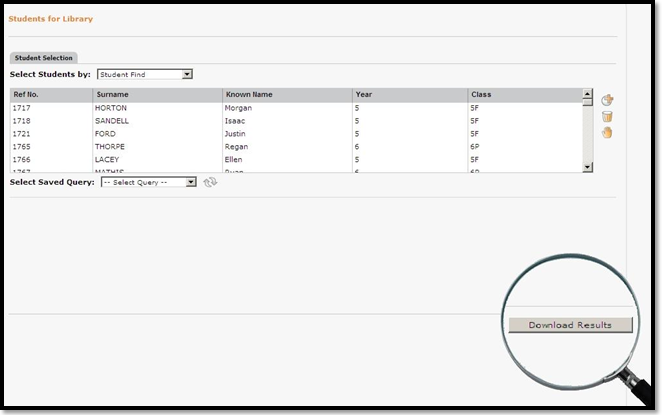
Click on the 'Download Results' button at the foot of the window.
Click the 'Save' button in the dialogue box that follows. Change the filename to students.csv and choose where the file is to be saved.

Amending the CSV
When altering the headers, it is important that you do not use Excel and instead use Notepad.
Open the CSV file with 'Notepad' and rename the column headers:
- Student Date of Birth = DateOfBirth
- Year Group = YearGroup
- Student Reference = ManagementSystemID
- Class = TutorGroup
- Student Sex (M - Male, F - Female) = Gender
- Name: Surname = Surname
- Name: Forename = Forename
- Name: Known Name = Forename
- Student Address - Line 1 = Address1
- Student Address - Line 2 = Address2
- Student Address - Line 3 = Address3
- Student Address - Line 4 = Address4
- Student Address - Town = Address5
- Student Address - Post Code = Postcode
- Student Email Address = Email
If you are importing any additional fields with your CSV the headers will need to be changed to match the library system.
When you come to import the CSV file, select the 'WBLS' option when prompted.
